
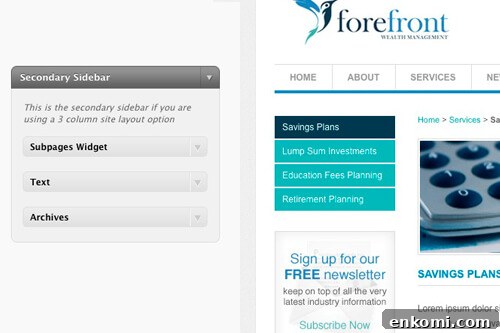
Once you’ve created a sidebar, you may want to add custom code to it. If no existing widget meets your needs, you have a few approaches:
- Use a plugin that executes PHP inside widgets. Avoid this — a PHP error can lock you out of the admin and make recovery difficult without direct database edits.
- Add the code before or after widgets in the theme files or, if using Thesis or Genesis, via a hook. This works for content that belongs strictly at the top or bottom, but it’s inflexible and doesn’t let an end user remove or rearrange the code as they can with widgets.
- Create your own widget.
I used option #2 for a while because I thought creating a widget would be more work than it was worth for small snippets. After reading Justin Tadlock’s excellent post on widgets, I started building my own instead.
Decide where your widget should live based on reuse: if it only applies to a specific theme, include it in the theme files; if it could be useful across different themes or clients, package it as a plugin so you can reuse it in future projects. Examples from recent work:
- Theme-specific: Navigation for a custom post type (for example, on a Person page list all posts in the People post type, grouped by Role).
- General widgets: A Subpages widget and a Twitter widget (I adapted the official Twitter widget into a WordPress plugin so all options can be configured from the Widgets screen).
There are two main kinds of widgets to build:
No Options Widgets
No-options widgets offer no configurable fields on the Widgets page — when dropped into a sidebar they display “There are no options for this widget.” These are ideal for inserting a fixed piece of functionality into a sidebar. One example is a Subpages widget.
The widget is registered and created as a class that extends WP_Widget so you can reuse WordPress’s built-in widget handling and only add your custom behavior. The key function is function widget(), which outputs the front-end HTML. For the Subpages widget the logic is:
- If the current page has a parent, retrieve all children of that parent; otherwise, retrieve all children of the current page.
- If any child pages exist, output them as an unordered list.
- Wrap the output with the theme-provided
$before_widgetand$after_widgetmarkup only when there is content to display, preventing empty widgets from showing up.
Widgets with Options
If you want the widget to be configurable on the Widgets page, you add two more pieces: a form() method that renders the widget options form, and an update() method that saves submitted values. Since your widget class extends WP_Widget these steps are straightforward. A common enhancement to the Subpages widget is to add a Title field the user can edit.
Typical additions for an options-enabled widget include:
- Retrieving the saved title at the start of the widget() function.
- After echoing
$before_widget, checking if a title exists and if so echoing$before_title, the title, and$after_title. - Using the update() method to sanitize input (for example, stripping tags from the title) before saving.
- In the form() method, setting defaults, loading current values (or defaults if not yet saved), and outputting the input fields for the admin to edit.
Extending WP_Widget keeps widget code organized and makes it easier to provide both simple, no-options widgets and more flexible, configurable widgets. For a complete walkthrough and code examples, see Justin Tadlock’s guide: “The complete guide to creating widgets in WordPress 2.8.”